DIY Training Treats
Feb 16, 2021The other amazing thing about DIY training treats is that you can work in nutrient dense materials like real chicken. I’m a big believer in real food for dogs (studies show reduces cancer risk, helps mental alertness and mood, and more!), and training treats are a part of that equation.
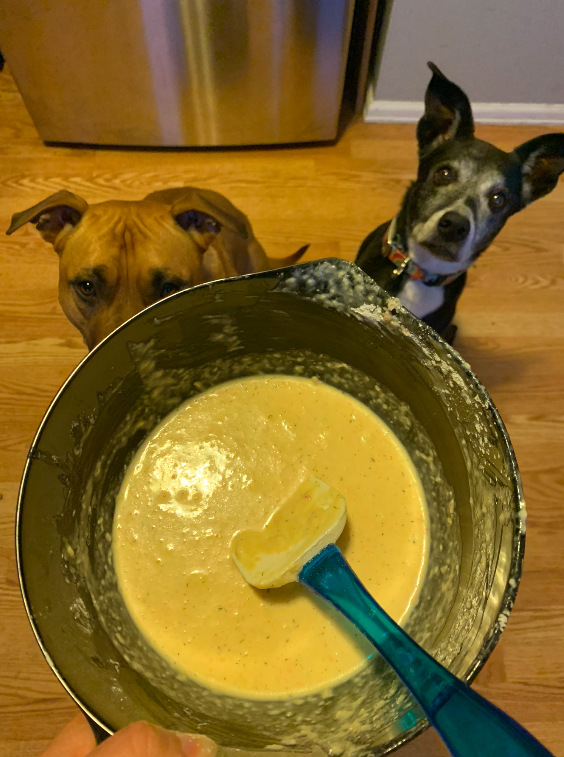
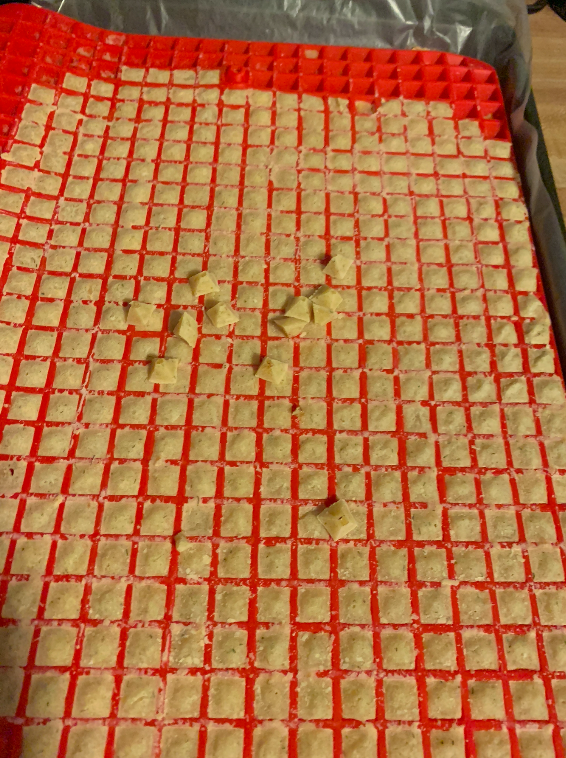
These pyramid pan molds are the perfect size and you can make hundreds or in my case thousands of treats with ease. You can find the molds I bought in my amazon shop.
I was first turned on to using tapioca flour in training treats from a great blog by Eileen and Dogs, it helps to keep the treats dense and prevents them from crumbling and gives them a spongy consistency. The treats are quite easy to hold and dispense which makes them ideal for training!
There is a lot of room for variation but these are the 2 recipes that I made. They yield enough to fill 2 pyramid pans. Play around with your dog’s favorite flavors to find the highest value reward for your dog.
Orange/ Pumpkin DIY Training Treats
- 10 oz Pumpkin (about 3/4 of a 15 oz can)
- 2 eggs
- 1/2 cup coconut milk
- 1 TBS MCT Oil
- 1 cup tapioca flour
- 1/2 cup all purpose flour
- 5 drops orange essential oil (optional – great scent)
Chicken/Dill
- 1 can chicken with water (9.75 oz)
- 2 eggs
- 1TBS MCT oil
- 1 cup tapioca flour
- 1/2 cup all purpose flour
- 1 TBS dried dill (optional – great scent)
Directions:
- Preheat oven to 350 degrees
- I sprayed my pans with oil to make it easier to get them out
- Blend wet ingredients in a food processor
- Mix blended wet ingredients with dry ingredients
- Spread batter into molds with spatula and be sure to wipe off excess batter. ( I found it easier to pour the batter in small amounts in all four corners and worked the batter inward)
- Bake for 15 minutes or until you can see the treats starting to lift. I made the mistake of not baking them long enough my first go which made a tedious task of popping each treat out individually. So if the treats don’t come out very well try baking it for longer)
I made a lot and then stuck what I wasn’t going to use in the coming week into the freezer.
Happy Training!
-Rachel Laurie Harris CPDT-KA
Join our email list to be the first to know when a new blog has been published!
We promise not to share your info or send spam emails!